|
|
|
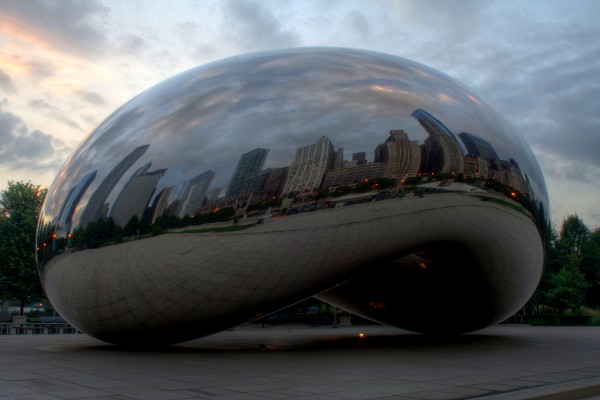
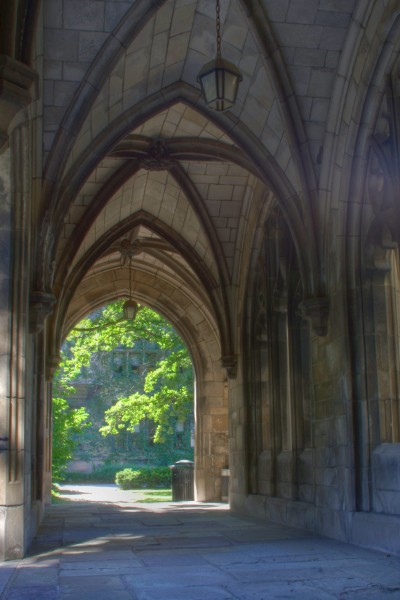
| Rockefeller memorial chapel | The bean (millennium park) | UofC walkway |
Welcome! This web page describes a set of command-line tools for creating and manipulating High Dynamic Range (HDR) images, which I'm provisionally calling "HDR Tools", although I suspect that this name is probably already taken. It consists of six programs: hdr_create, hdr_fix_ca, hdr_denoise, hdr_squish, hdr_adjust and hdr_convert.
The first of these, hdr_create, takes as input a set of bracketed photographs, and creates an HDR image, which is then saved in EXR format. The second and third, hdr_fix_ca and hdr_denoise, fix chromatic aberration and CCD noise (respectively) in an HDR image (in EXR format), outputting the result as another EXR. The fourth, hdr_squish, performs tone mapping on an EXR HDR image, and outputs another EXR file containing the result. The fifth, hdr_adjust, permits you to crop, and perform some simple color manipulations, on an HDR image. The final program, hdr_convert, takes as input an EXR image, performs gamma correction and (optionally) adjusts the exposure, and converts it into a "normal" image (a JPG, for example). If you just want to use these programs, and are not interested in how they work, then skip to the downloads or getting started section.
Paul Debevec and Jitendra Malik. Recovering High Dynamic Range Radiance Maps from Photographs. Proceedings of the 24th annual conference on computer graphics and interactive techniques. Pages 369-378. 1997. Web page.
The changes from the algorithm described in this paper are fairly minor. The most significant is probably that my implementation does not assume that the exposure durations are known--instead, it expects that the total number of stops spanned by the bracketed exposures is known, heuristically finds the brightest and darkest images (setting their exposure durations appropriately), and then solves for the others as a part of the optimization.
Additionally, the optimization problem described in the paper may be simplified by noting that the optimal log-intensities are simply weighted linear combinations (with known coefficients) of the response curves and log-exposure durations, Hence, they may be removed entirely from the optimization, significantly decreasing the size of the problem, and permitting many more than the 50-or-so pixels suggested by Debevec and Malik to be used.
Finally, while Debevec and Malik mention that the response curves are expected to be monotone, it isn't clear whether they actually impose monotonicity as a constraint during the optimization (or maybe they are clear, and I'm just a bad reader). I found that doing so significantly improves the quality of the results, although this makes optimization more difficult. I use the gradient projection algorithm with conjugate gradient inner iterations.
The hdr_fix_ca program implements an algorithm similar to:
Sing Bing Kang. Automatic Removal of Chromatic Aberration from a Single Image. Proceedings of the IEEE Conference on Computer Vision and Pattern Recognition. Pages 1-8. 2007.
The difference is mainly that I attempt to align locally-normalized Canny edge strengths, rather than (as Kang does) the color channels themselves, in the region of color-sensitive edges. I also only perform color-channel scaling, with none of the more advanced processing of Kang's paper. Like Kang, I use the Nelder-Mead simplex algorithm for (approximate) optimization, which causes this program to be, frankly, dog slow.
The hdr_denoise program implements the following algorithm:
Jeff Orchard, Mehran Ebrahimi and Alexander Wong. Efficient Nonlocal-Means Denoising Using the SVD. Proceedings of the IEEE Conference on Image Processing. Pages 1732-1735. 2008.
The only significant difference between my implementation, and the algorithm described in the paper, is that I use a Tukey window, rather than a rectangular window, when determining the L2 distance between the neighborhoods of two pixels. Attempts were made to optimize, but this program is probably even slower than hdr_fix_ca.
The hdr_squish program implements the following algorithm:
Raanan Fattal, Dani Lischinski and Michael Werman. Gradient Domain High Dynamic Range Compression. Proceedings of the 29th annual conference on computer graphics and interactive techniques. Pages 249-256. 2002. Web page.
My implementation of this algorithm is fairly faithful. The primary difference is that I redefined the "beta" parameter as 1-beta, and also added two new parameters: delta and theta. The first of these is simply an upper bound on the magnitude of the attenuation factor at a given position and pyramid level, and is needed in order to cope with small gradients (for which the attenuation factor may become arbitrarily large).
As described in the paper, small gradients are magnified, while large gradients are reduced, with alpha being the point, as a proportion of the average gradient magnitude, at which the transition between these two regimes occurs. The paper isn't clear on whether this average is taken over all gradients, or only those on the current pyramid level. I resolve this by using a convex combination, with parameter theta, of these two averages.
The paper suggests using the multigrid method as described in Numerical Recipes, and I do so, with the difference that instead of using Gauss-Seidel smoothing iterations, I run (a specified constant number of) conjugate gradient iterations at each level before moving to the next one. Additionally, my implementation uses a fairly naïve heuristic to make the algorithm adaptive, which nonetheless seems to outperform changing between grid levels on a fixed schedule. I simply check whether the termination criterion is satisfied for the current grid level, after performing the conjugate gradient iterations. If it is, then I move to the finer level, otherwise to the coarser level.
You may use hdr_adjust to independently adjust each color channel in an EXR file as c=scg, where "c" is the color value, "s" is a scaling parameter, and "g" is a gamma parameter (so named due to the similarity to gamma correction). There may be some benefit (in terms of accuracy) in performing such manipulations using this program, rather than converting the HDR file back into a standard low-dynamic range format, and then using an image editor, but this is likely to be negligible.
The hdr_convert program exists simply to convert an EXR file created by hdr_create or hdr_squish into a more convenient format. Doubtless many other image manipulation tools could do this just as well (or better).
The implementation is in C++, and the tools currently run on Linux, Windows and MacOS X, although extremely limited testing has been performed on the latter two platforms. In order to compile, you'll require the popt, LibTIFF, OpenEXR and ImageMagick libraries. Under Windows, I used MinGW to install these dependencies and compile HDR Tools, while under MacOS X, I used MacPorts. The programs all make use of OpenMP for multi-threading, which does improve performance significantly. Unfortunately, I have been unable to build with OpenMP enabled on any platform other than Linux.
I've included statically-linked binaries for Windows, which hopefully will work on most systems. There are two versions, one of which uses SSE2 instructions, and the other of which does not (in all likelihood, your system supports SSE2).
All source code is copyrighted, and licensed under the GPLv3.
TAR.GZ ZIP Source code hdr_src.tgz (39K) hdr_src.zip (56K) Windows binaries hdr_windows.zip (15M) Windows binaries (SSE2) hdr_windows_sse2.zip (15M) Sample images hdr_images.tgz (3M) hdr_images.zip (3M)
The sample images are included so that you can follow along with the "getting started" section, below.
There is no GUI--these are all command-line programs. They all accept the "-h" option, which will display (hopefully fairly useful) help, describing all of the options, and how they should be used:
> hdr_squish -h
In this, and all other example command-lines, the ">" character represents the prompt, with the remainder of the text being the command you should type. You may also view the help for each program by following these links: hdr_create, hdr_fix_ca, hdr_denoise, hdr_squish, hdr_adjust and hdr_convert. It's worthwhile to carefully read these, but really, nothing substitutes for trial-and-error. Particularly in the case of hdr_squish, it is extremely difficult to predict what the output will be, based on the numeric values of the parameters. One just needs to experiment.
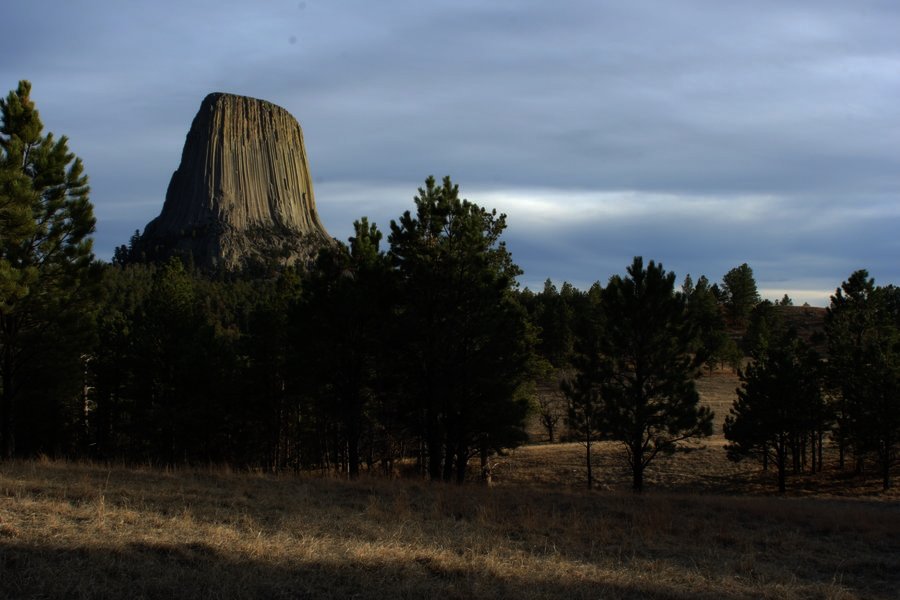
For the remainder of this section, I'll go through an example of how to use these programs (aside from hdr_fix_ca and hdr_denoise, which are only useful in "special circumstances"). Download the example images from the downloads section above, before proceeding further. The archive should contain nine bracketed images of Devil's Tower in Wyoming (with raindrops on the lens--sorry about that!).
We'll start by merging these nine images into a single HDR image:
> hdr_create -s 8 -o devil_hdr.exr devil?.jpg
The "-s" flag is used to specify the number of stops spanned by the input images--in this case, eight. The "-o" flag names the output image, which must be in EXR format. The remaining parameters are the input images--the "?" character in "devil?.jpg" matches all nine of the input images, although we could just as well have listed them, separated by spaces. Other possible options to hdr_create are lambda ("-l"), which determines how smooth the recovered response curves should be, and epsilon ("-e"), which controls the accuracy of the recovered solution. Be aware that if you make epsilon too small (requesting too accurate a solution), then the program may never terminate!
Now that we've created "devil_hdr.exr", we can convert it into a JPG to take a look:
> hdr_convert -i devil_hdr.exr -o devil_hdr.jpg
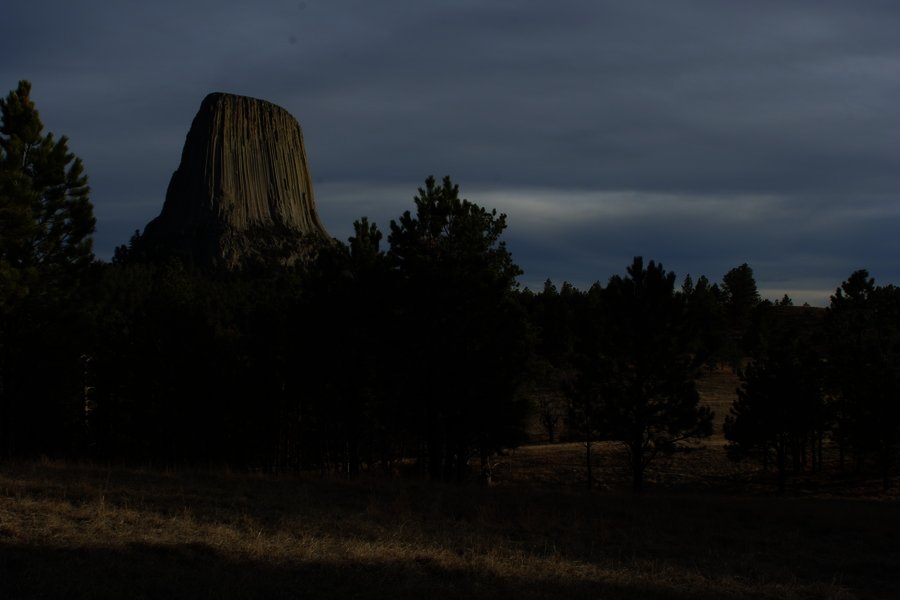
Here, "-i" specifies the input file (which must be an EXR), and "-o" the output file, for which the format will be inferred from the extension. Since the input is an HDR image, while the output is not, we might want to output the image at a different simulated exposure setting than the default. For example:
> hdr_convert -s 2 -i devil_hdr.exr -o devil_hdr_p2.jpg
> hdr_convert -s -2 -i devil_hdr.exr -o devil_hdr_n2.jpg
This will create two new images, "devil_hdr_p2.jpg" and "devil_hdr_n2.jpg", the former of which is two stops overexposed, and the latter two stops underexposed, in both cases relative to "devil_hdr.jpg". The "-s" option to hdr_convert controls the number of stops by which the output image should be overexposed (a negative number causes it to be underexposed).
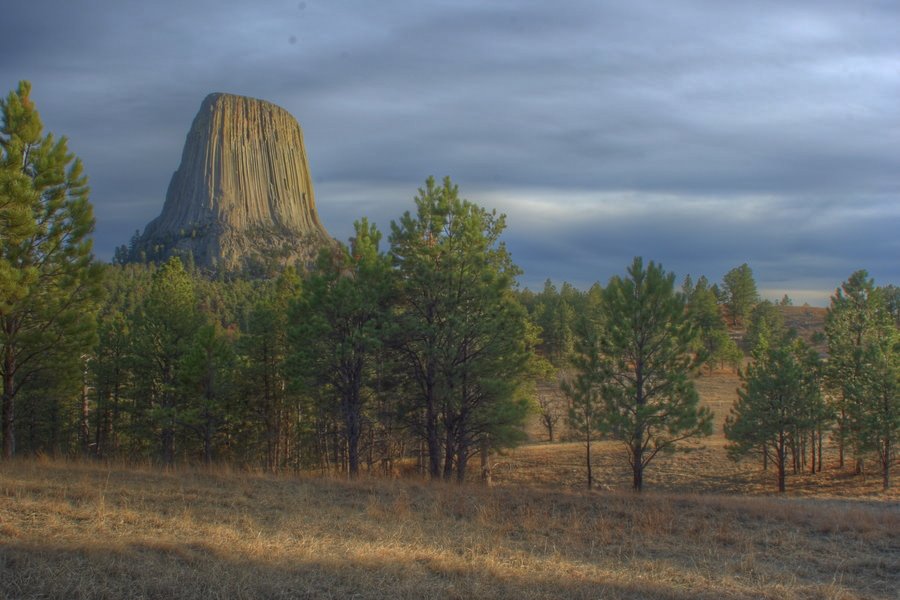
If we don't just want to view our HDR image at different exposure settings, but instead want to perform tone mapping, hopefully with the result that both shadows and highlights will be well-exposed in the same image, we use the hdr_squish tool:
> hdr_squish -i devil_hdr.exr -o devil_hdr_squished.exr
> hdr_convert -i devil_hdr_squished.exr -o devil_hdr_squished.jpg
This creates a "squished" HDR image with hdr_squish, using the default parameters, and converts it into a JPG using hdr_convert. As usual, the "-i" parameter to hdr_squish specifies the input image, and "-o" the output, both of which must be in EXR format. Your final set of output images should look something like this:
original HDR
two stops overexposed
two stops underexposed
squished
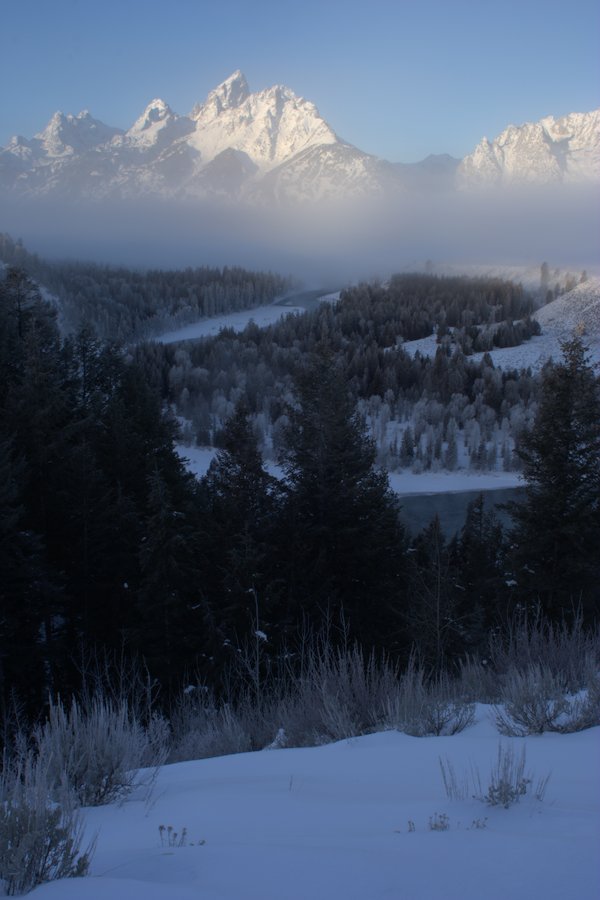
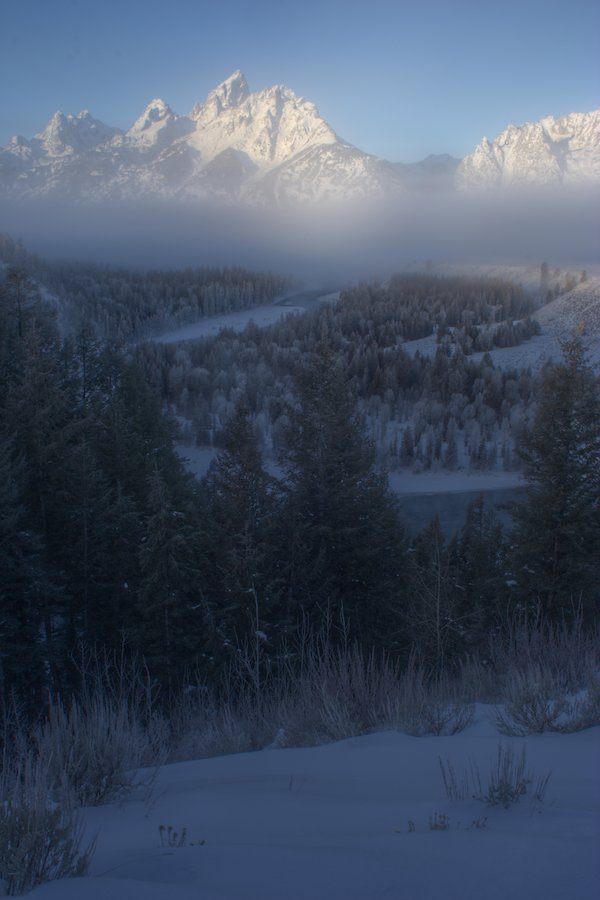
This Devil's Tower image is a bit unusual in that the default parameter values for hdr_squish give acceptable results. Generally, one needs to experiment a fair amount first. As a general rule, the "most important" parameters to hdr_squish are beta ("-b") and theta ("-t"). My most commonly-encountered problem is too much HDRification, which one may correct by reducing beta (usually to 0.05 or smaller). Let's explore the effects of various settings of the parameters to hdr_squish. The archive of example images also contains "snake_river_hdr.exr", an HDR image (made using hdr_create) of Snake River Overlook in Grand Teton National Park. Let's first see how it looks with no tone mapping:
> hdr_convert -i snake_river_hdr.exr -o snake_river_hdr.jpg
And next see what happens when we pass it through hdr_squish with the default parameter values (alpha=0.1, beta=0.1, delta=1.1, theta=0):
> hdr_squish -i snake_river_hdr.exr -o snake_river_hdr_squished_defaults.exr
> hdr_convert -i snake_river_hdr_squished_defaults.exr -o snake_river_hdr_squished_defaults.jpg
The alpha parameter ("-a") must between zero and one, but generally it should be quite small (around 0.1, the default). Increasing it will result in large gradients being reduced less, and small gradients being increased more, which has the effect of preserving the large-scale (spatially) contrast, while slightly increasing the small-scale details. Decreasing alpha has the opposite effect. Let's try halving and doubling alpha, to see what happens:
> hdr_squish -a 0.05 -i snake_river_hdr.exr -o snake_river_hdr_squished_alpha005.exr
> hdr_squish -a 0.2 -i snake_river_hdr.exr -o snake_river_hdr_squished_alpha02.exr
Note that I didn't write out the hdr_convert commands this time--remember to convert these images to JPGs, so that you can view them.
The beta parameter ("-b"), which also must be between zero and one, but should, like alpha, be on the low end of this scale, essentially controls the "strength" of the tone mapping. While the other parameters determine the type of effect, beta controls its magnitude. We'll try halving and doubling beta from its default value:
> hdr_squish -b 0.05 -i snake_river_hdr.exr -o snake_river_hdr_squished_beta005.exr
> hdr_squish -b 0.2 -i snake_river_hdr.exr -o snake_river_hdr_squished_beta02.exr
The theta parameter ("-t") should be between zero and one, but may freely take on values at either end of this scale. For small values of theta, large-scale (spatially) contrast differences will generally be smoothed out less, while for large theta, they will be smoothed out more. The default is zero, so lets try one half, and one:
> hdr_squish -t 0.5 -i snake_river_hdr.exr -o snake_river_hdr_squished_theta05.exr
> hdr_squish -t 1 -i snake_river_hdr.exr -o snake_river_hdr_squished_theta1.exr
The final parameters to hdr_squish are delta ("-d"), which must be greater than one, and generally has little effect on the output (occasionally increasing it to two or so, from its default of 1.1, may be helpful), epsilon ("-e"), which, analogously to the epsilon parameter to hdr_create, determines the accuracy of the solution, and saturation ("-s"), which essentially effects the color saturation level of the output (larger for more saturated, smaller for less). We won't experiment with these parameters here. The resulting set of Snake River Overlook pictures should look like this:
original HDR
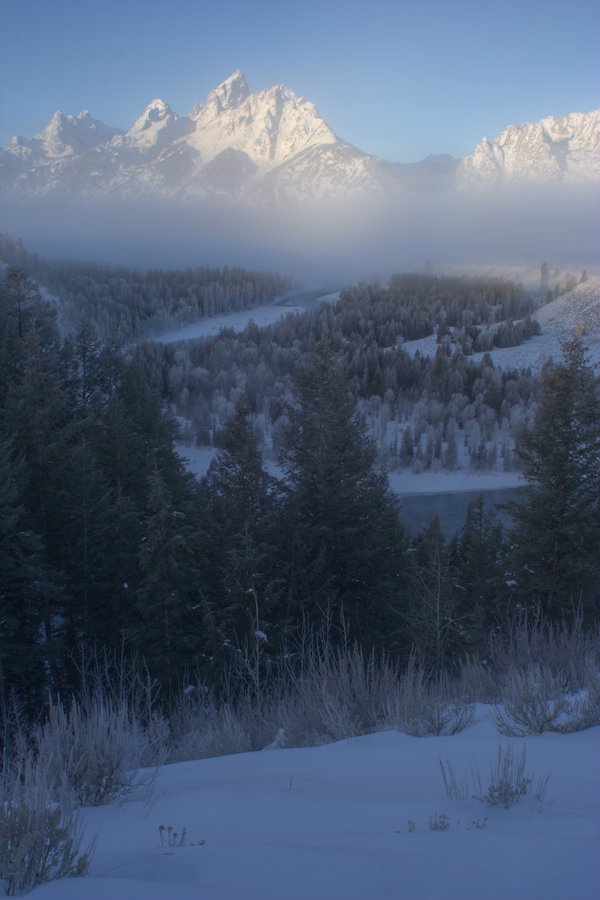
alpha = 0.1
beta = 0.1
theta = 0
(defaults)
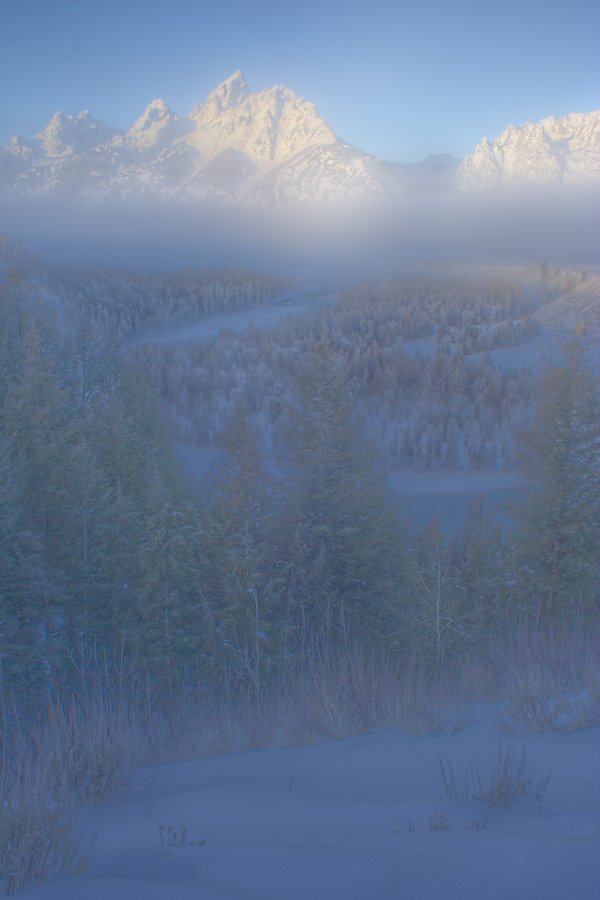
alpha = 0.05
beta = 0.1
theta = 0
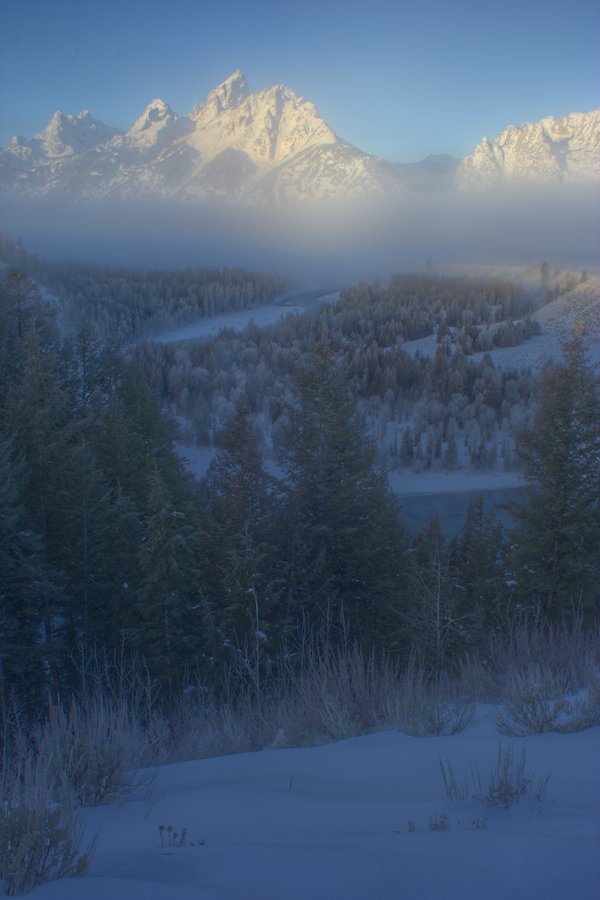
alpha = 0.2
beta = 0.1
theta = 0
alpha = 0.1
beta = 0.05
theta = 0
alpha = 0.1
beta = 0.2
theta = 0
alpha = 0.1
beta = 0.1
theta = 0.5
alpha = 0.1
beta = 0.1
theta = 1
You may notice that all of these images look a bit washed-out. This has occasionally been an issue for me, although the problem is particularly severe on this photograph. After running hdr_squish and hdr_convert, I generally load the result into the GIMP for manual editing.
Another alternative, although it is much less flexible, is to use the hdr_adjust program. This program takes scaling ("-r", "-g", "-b") and gamma ("-R", "-G", "-B") parameters for each of the red, green and blue color channels, and adjusts the colors as c=scg, where "c" is the color value, "s" is a scaling parameter, and "g" is a gamma parameter. Let's try this out on the squished Snake River picture which was created with theta=0.5:
> hdr_adjust -b 0.9 -R 1.3 -G 1.3 -B 1.3 -i snake_river_hdr_squised_theta05.exr -o snake_river_hdr_adjust.exr
The above command will increase the saturation level of all three color channels to the same extent (the "-R", "-G" and "-B" parameters), and will also reduce the magnitude of the blue channel by a factor of 0.9 (the "-b" parameter). As a rule, although you are free to assign different values to the gamma parameters for each channel, doing so usually gives back weird-looking results, so in general, all three of "-R", "-G" and "-B" should be given the same value. This caveat does not apply to the scaling parameters--assigning different values to "-r", "-g" and "-b" is totally fine. The result looks like this:
Original
Adjusted
This is a slight improvement, but really it is much better to perform such manipulations in an image editor.
The provided Devil's Tower pictures have been shrunk from their original sizes, and no chromatic aberration is apparent. In the originals, however, there is noticeable chromatic aberration. If we suppose that "devil_hdr_ca.exr" is the 3474x2314 HDR file created, using hdr_create, from these originals, then the chromatic aberration may be fixed with:
> hdr_fix_ca -d 3 -i devil_hdr_ca.exr -o devil_hdr.exr
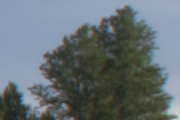
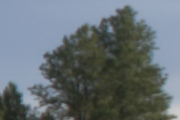
The degree ("-d") parameter determines the degree of the polynomial scaling function. Three seems to be widely-used, but I have found that zero or one (the default) work perfectly well. The difference between the output and the original is difficult to see, but if we zoom in on one of the trees towards the right side of the image, we'll see something like this:
Original
Fixed
You'll probably need to zoom in on these images to notice this, but in the original, there is a reddish tint on the left side of the tree, and a bluish tint on the right side. The program still needs work, and this color channel misalignment is also present In the "fixed" image, but is much less pronounced.
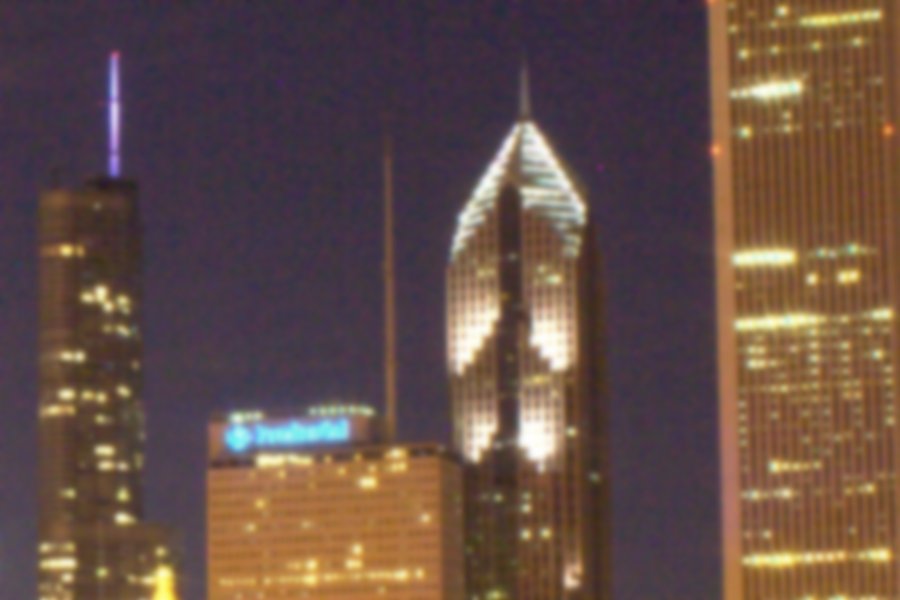
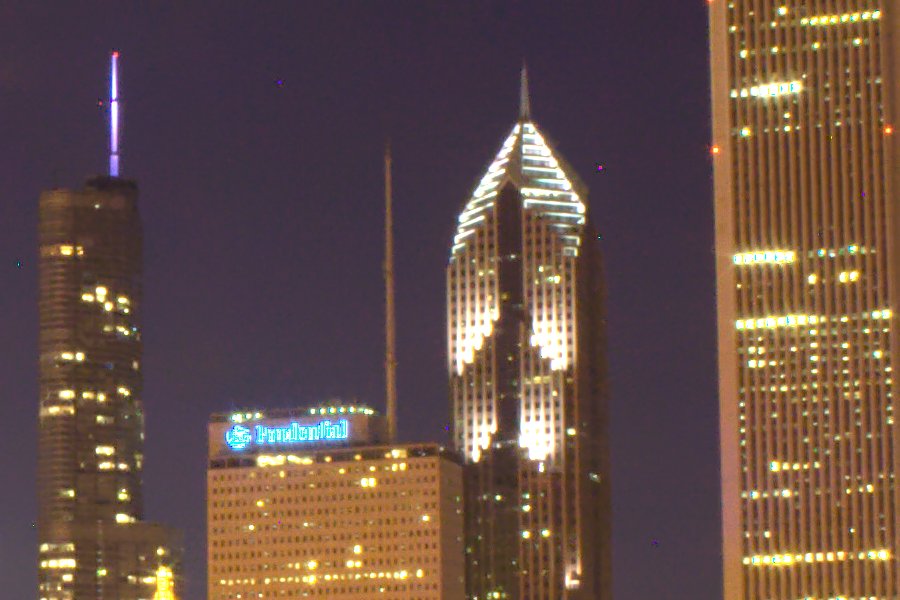
When taking very long exposures with a digital camera, noise can be an issue. The following images show a brightened detail view of a photograph I took a downtown Chicago at night, a 30-second exposure at f/22 (this is much too small an aperture). The first is the original image, while the second shows the result of applying the most obvious technique to reduce noise (a Gaussian blur):
Original
Blurred
The handful of brightly-colored points correspond to pixels in my camera's sensor which seem to consistently report overlarge numbers during long exposures--this, and noise, are separate issues. Blurring the image obviously didn't help much--it might even have done more harm than good! If we instead run the hdr_denoise program:
> hdr_denoise -i chicago.exr -o chicago_denoised.exr
Then the result will look something like this:
Original
Denoised
We can see that the noise is largely eliminated, while the detail in the buildings is (mostly) preserved. Unfortunately, this result comes at a significant computational cost: the non-local means algorithm, which hdr_denoise implements, is extremely slow.